James Catmur
Site Admin

Joined: 14 Sep 2006
Posts: 1463
Location: Cambridge


|
 Posted: Sep 12, 2011 06:46 Post subject: Asking: "What is this? / Where is it from?" Posted: Sep 12, 2011 06:46 Post subject: Asking: "What is this? / Where is it from?" |
|
|
Asking: "What is this? / Where is it from?"
If you want to ask about a mineral specimen that you have, please give us as much information as you can, as it will help other members give you a better response. Please read this advice carefully. It is a bit long and it might seem a bit ‘heavy’ but using it really is worthwhile.
1 - PHOTO of the specimen should be clear. Use the macros feature on your camera for small specimens. If your camera does not have a macro option then keep the camera at least 50-70 cm from the specimen. If the size of the specimen in the image is then too small, trim the photo and upload the trimmed photo. Use day light if you can so that you get good color, and if you cannot use a low power (22W, say) day light bulb, and keep the camera on a tripod or something else to keep it stable. To avoid reflection from the flash try putting tissue paper over the flash (do not use glue or scotch tape to hold this on, dampening it will be enough)
2 - LOCALITY, often just by telling other people about the mine, town or things near the locality the answer will be far easier, as other collectors or experts may well know the paragenisis and from the form and color may be able to identify the mineral.
3 - MATRIX, which is the rock on which the mineral sits. If you do not understand minerals then you may know even less about rock types but it really helps if you can tell the difference between a volcanic rock, granite, pegmatite, gneiss, sandstone or limestone. Or send a photo of the rock the mineral sits on as well as a photo of the mineral.
4 – COLOR, try to describe it as best as you can by referring to other rocks or other everyday items. On many occasions the color of the photo will not be accurate so the color of the mineral will not be correct – so tell us the color you can see in day light.
5 - LUSTER is possibly the hardest for those starting out in the hobby: it is best to check this using daylight, to say that it is ‘metallic’ is easy, ‘semi-metallic’ a bit harder and then ‘non-metallic’ easy again: In the latter you can add other descriptions such as ‘silky’ (fibrous gypsum), ‘glassy’ (quartz), ‘greasy’, ‘waxy’ (talc), and ‘resinous’ (sphalerite).

Pearlescent, Gypsum
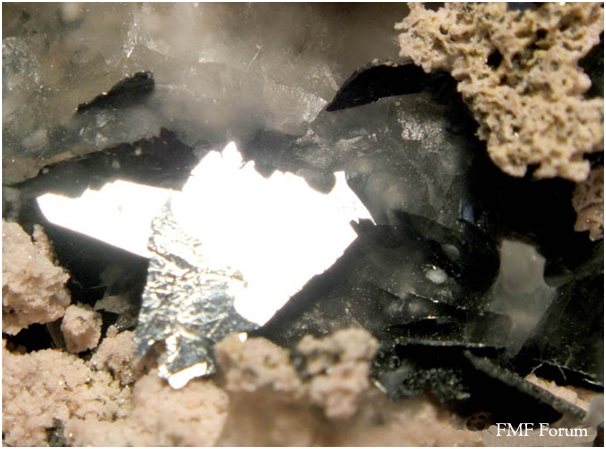
Metallic - Hematite
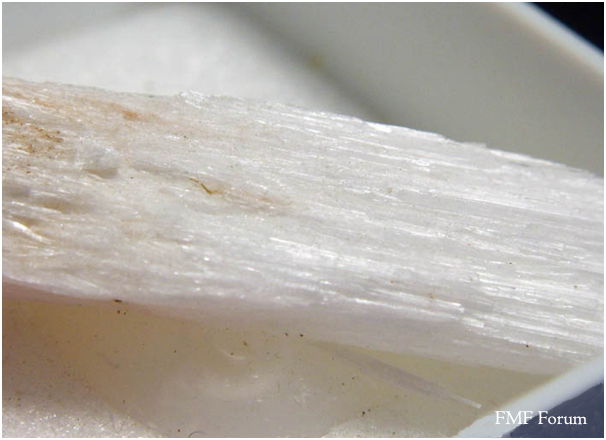
Silky - Gypsum
6 - FORM (HABIT), if the crystals you are interested in have a well-defined geometric form please describe it. Use a pocket magnifying glass to examine it if it is small. Here are some examples:
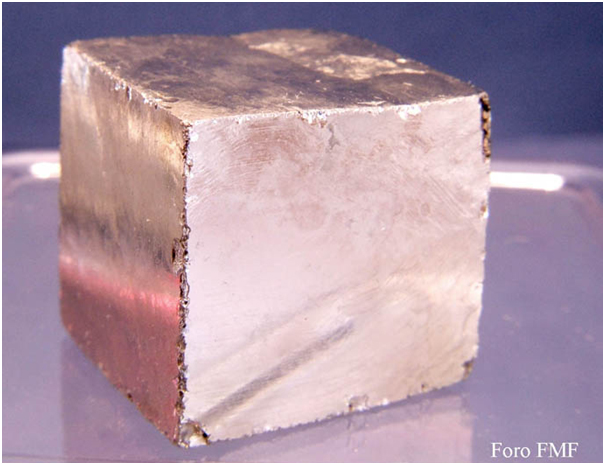
Cube: Pyrite
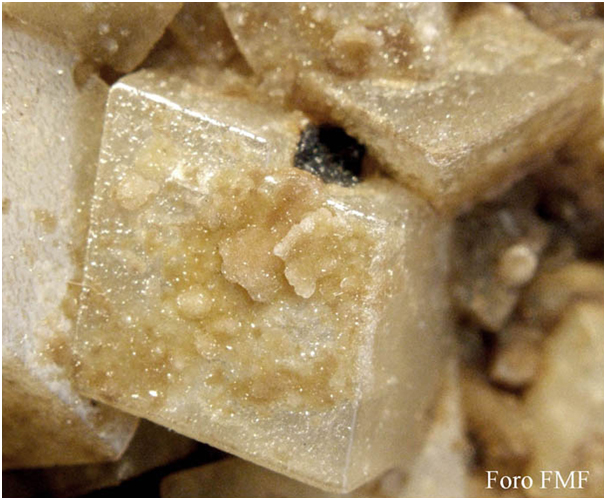
Rhombohedra: Dolomite
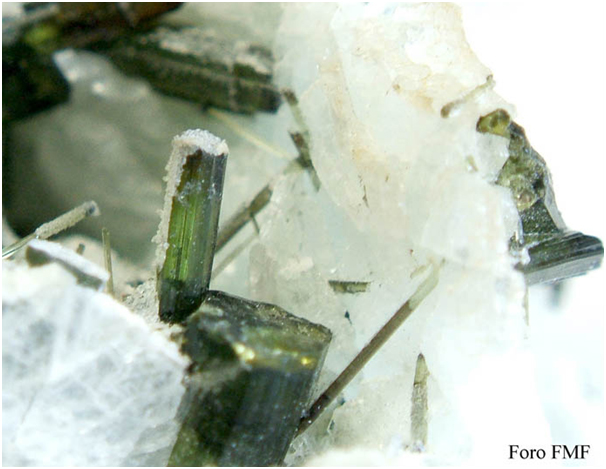
Columnar: Tourmaline
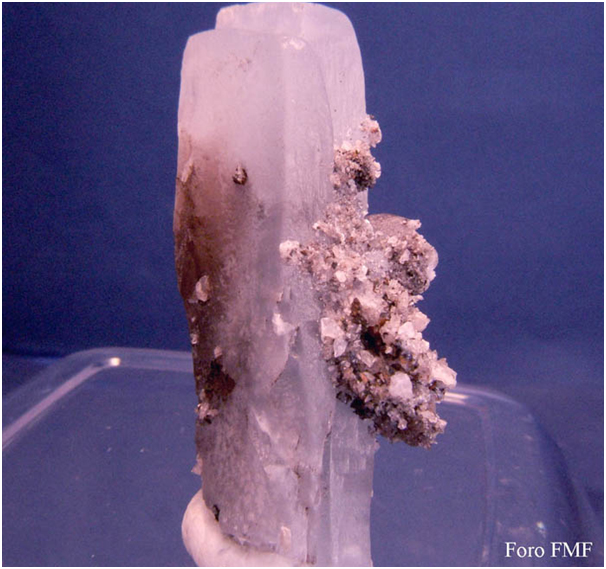
Tabular: Baryte
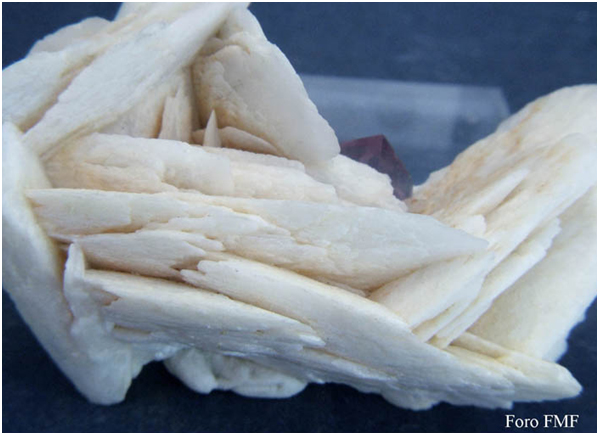
Leafy: Baryte
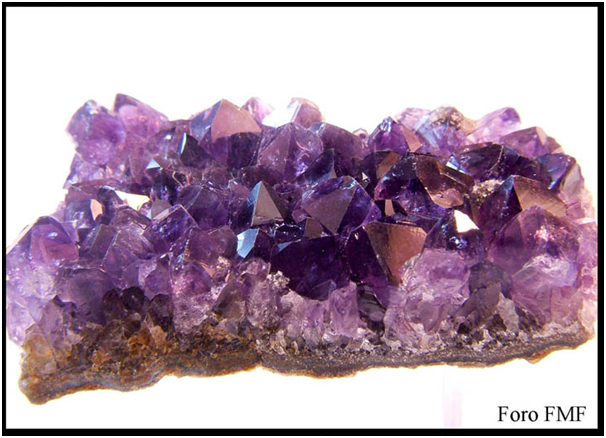
Group of crystals: Amethyst Quartz
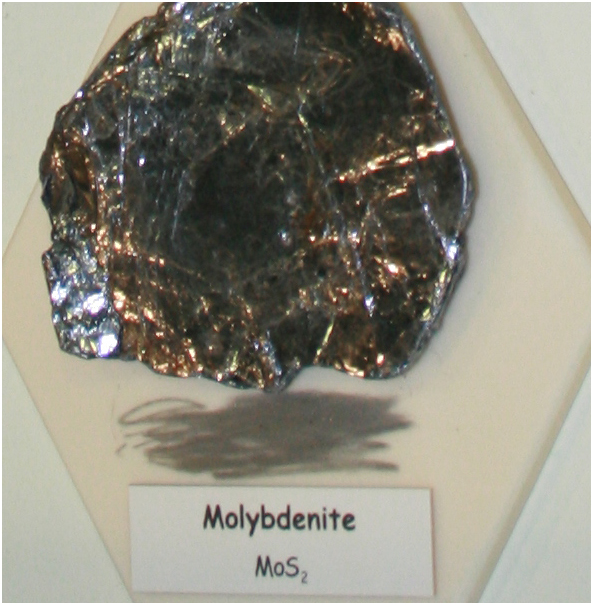
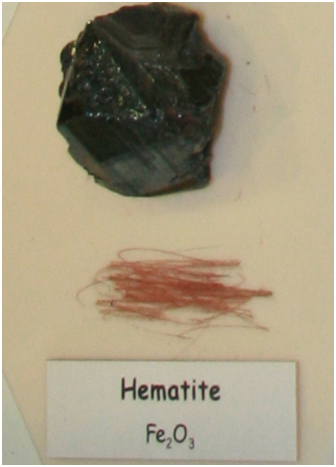
7 - STREAK, you can determine this with some simple homemade tools: the base of an unglazed pot, plate, or tile … as long as it is porcelain. Always try to rub a fresh section of the mineral you are interested in on the porcelain and see what color the streak is: oxidized sections or coatings can ruin the results. If you are handy and have a Dremel type tool you can take a broken piece of glazed porcelain and remove the glaze – then you have your own tool for doing streak tests.
For example, this is a streak test for Molybdenite and Hematite (with thanks to the Colorado School of Mines):
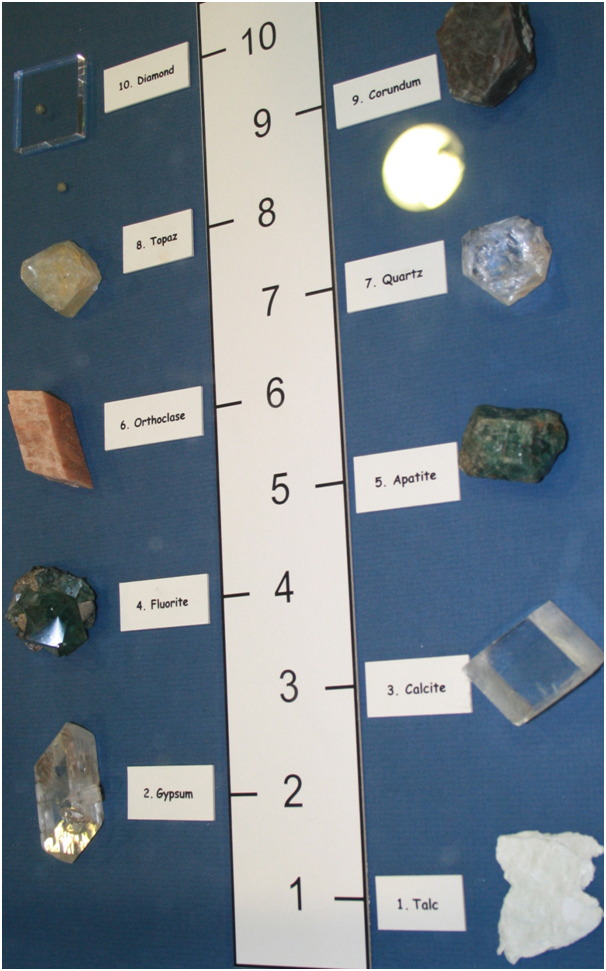
8 - HARDNESS, this is tested using a range of other minerals that are easily available: 1- talc, 2- gypsum, 3-calcite, 4-fluorite, 5-apatite, 6-orthoclase and 7-quartz. Try to find a sample with a fresh surface (not oxidized or altered) that is flat. Some of these can be found in nature, maybe near your house, or by exchange or cheaply from a mineral show if you tell dealers that you want samples for doing hardness tests. They do not need to be crystals, so that can be pieces that have been created while trimming specimens, etc.
There are other house hold things you can also use: your thumb nail (harness 1-2), a copper coin (3), the blade of a knife (4-5), a nail file (6), glass (6-7).
Take your unknown mineral and try scratching other materials with it or scratching it with them. Its hardness is between that of the hardest thing it will scratch and it will not scratch in the scale. So if it will scratch fluorite but not apatite then it is hardness 4.5.
The hardness scale (with thanks to the Colorado School of Mines)
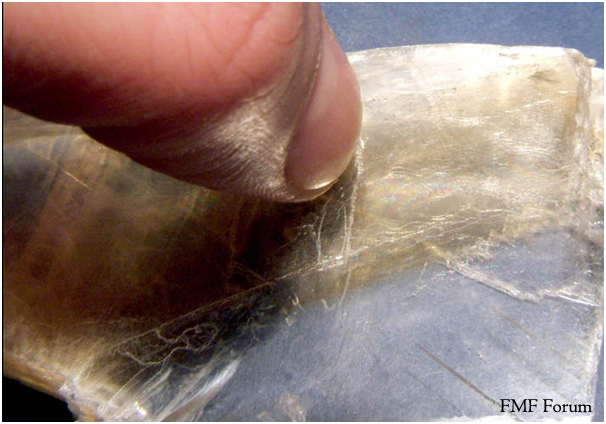
Hardness test on Gypsum
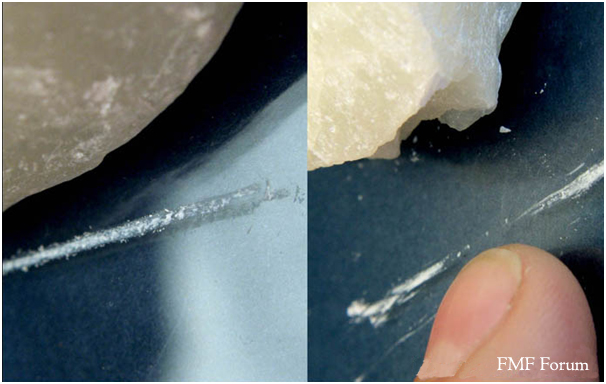
Hardness test: The glass is harder than the mineral (Talc)
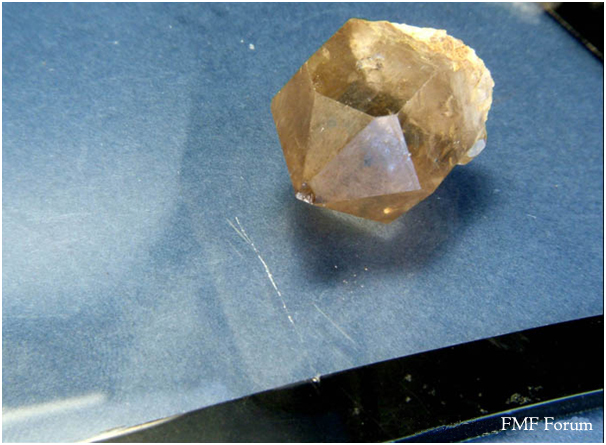
Test on glass – it is scratched (Citrine Quartz)
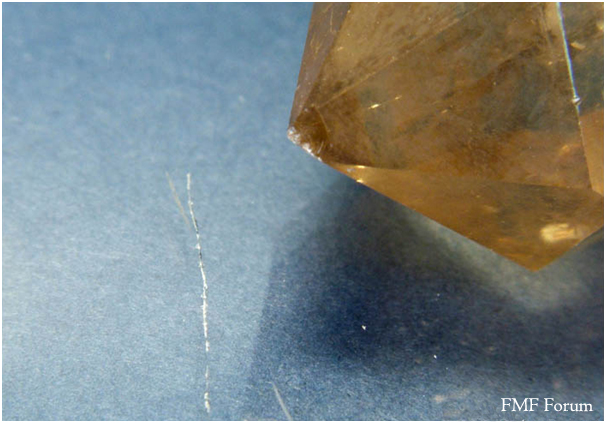
Hardness test: Citrine Quartz on glass
9 - OTHERS:
There are other physical properties that we can use as they can help us, although some are more difficult: TRANSPARENCY, FRAGILITY, DENSITY, but we will leave them for now.
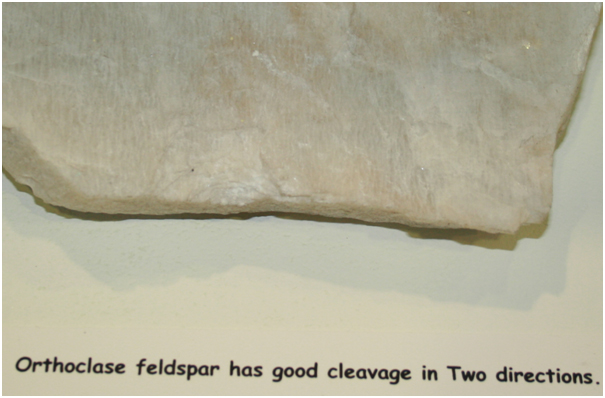
Cleavage describes how a mineral breaks.Many minerals break along planes parallel to their atomic planes. This can help you identify a mineral as minerals can show no cleavage or up to six planes of cleavage.
These examples show cleavage of different minerals, again with thank to the Colorado School of Mines.
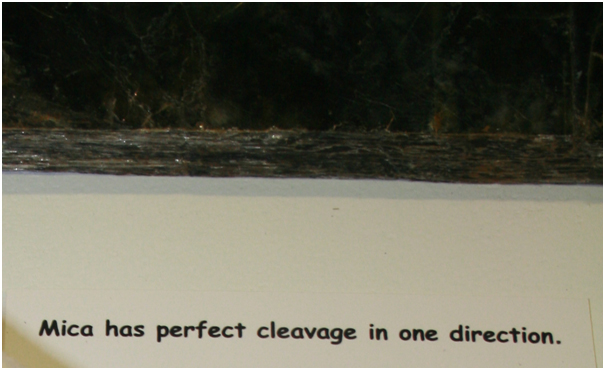
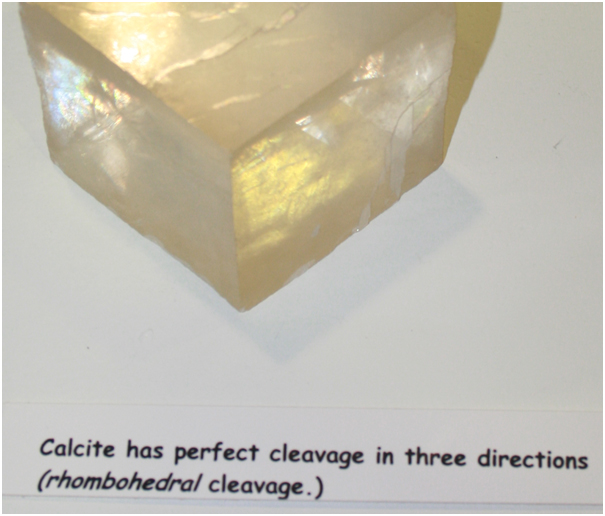


The fact that Quartz has no cleavage is a great help in identifying a mineral – if you specimen shows cleavage it is not Quartz.

Another simple property is MAGNETISM which can be tested with a magnet that you can get from many sources, even the ones used for kid’s toys and publicity, which are great for testing minerals that are weakly magnetic.
With a low cost long wave ultra violet (UV) lamp you can check to see if the mineral is fluorescent or not. For example:
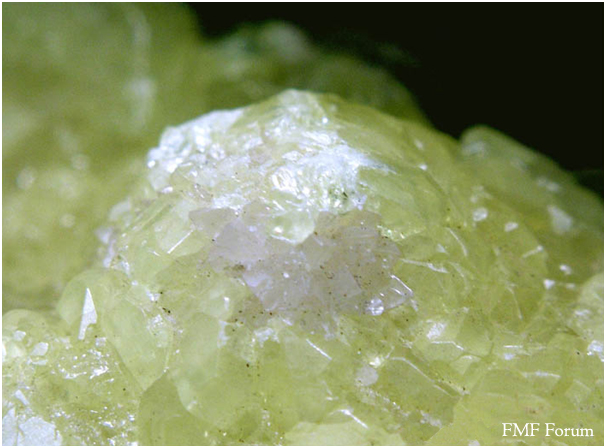
Calcite and Sulfur using a natural light source
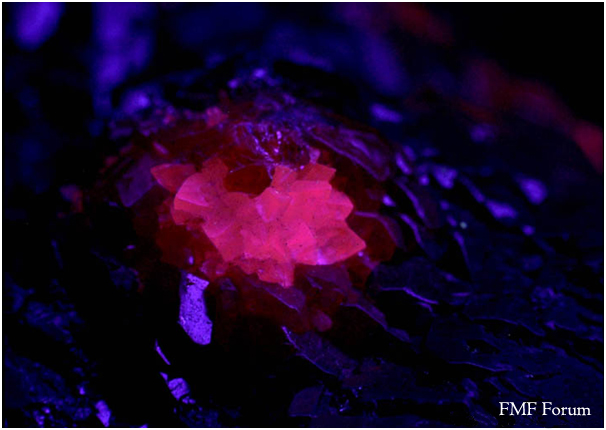
Calcite and Sulfur using a long wave length UV light source
10 - CHEMICALS:
You can test chemical properties for some minerals. For example, a few drops of hydrochloric acid (dilute or concentrated) can be used to see if bubbles form or the mineral dissolves.
All such test should be done with great care. The best way is to put some drops of the acid on a neutral surface (say a sheet of glass) and then place the tip of the mineral in the acid and see if any reaction occurs. You should have distilled water nearby so that you can quickly clean the sample. If the mineral you are testing is not near the tip of the specimen you can soak a wooden material (say a toothpick) in the acid then use it to transfer a drop of the acid onto the mineral of interest to see if there is a reaction, quickly cleaning the specimen afterwards.
ALWAYS USE GLOVES, EYE PROTECTION AND A FACE MASK AS YOU CAN NEVER KNOW WHAT REACTION YOU MAY GET

Testing using a 20% solution of hydrochloric acid.
WARNING! Working with chemical products is dangerous (they are corrosive and toxic). Use them in well ventilated areas, always use gloves, protective goggles and a face mask.
You can also try a safer warm vinegar test on anything that you suspect to be calcite / limestone / marble (in that decreasing order of reactivity). Not much else will bubble in an acid as weak as vinegar, and vinegar is both safe and easily attainable. Note that the bubbling may be slow - you can increase the reaction rate by powdering the sample or using slightly warmer vinagar.
IMPORTANT: In no way is this all there is on this subject on the web. It is a good introduction but there are great books and magazines out there where you can find far more information and there are other web sites that can help you with this process.
Thanks to this and other forums and their members who visit them the amount of information on the web continues to grow with more images and information, so there will be more out there to help you than those thoughts we have suggested above.
If you can just give some of this information when you ask about a mineral you will help others help you. That said do not expect miracles, as there is nothing better than holding a specimen in ones hands.
This text was written by Carlos J. Rodríguez, who was helped by Juan De Laureano (Nitana2000) and it was reviewed by Jordi Fabre and then translated by James Catmur. |
|
Matt_Zukowski
Site Admin
Joined: 10 Apr 2009
Posts: 737
Location: Alaska


|
 Posted: Sep 12, 2011 06:46 Post subject: Specific Gravity Posted: Sep 12, 2011 06:46 Post subject: Specific Gravity |
|
|
There is another test that can be very helpful for identifying minerals: specific gravity.
Specific gravity is the density of a specimen relative to water.
All you need is a scale that is accurate over the relevant weight. A good way to measure specific gravity at home can be found here https://www.mineral-forum.com/message-board/viewtopic.php?p=38375#38375
If you want to use a lower-tech, less accurate, more brute force method, you can:
1) Measure the volume of the specimen with just a measuring cup.
i) put water in a measuring cup to a level higher than the size of the specimen.
ii) place the specimen in the cup with the water.
iii) measure the volume increase by how high the water rose in the measuring cup. The difference between the water volume before you added the rock and after you added the rock is the volume of the rock.
iv) convert this volume measurement to cubic centimeters if necessary.
2) Weigh the specimen. Convert this weight to grams if necessary
3) Determine the specific gravity.
Water has a specific gravity of 1, and it weighs 1 g/cc. If your specimen weighs 4 grams and occupies a volume of 1.4 cubic centimeters, then its density in g/cc is 4/1.4 or 2.85 g/cc. Such a rock has a specific gravity of 2.85.
At home, I have a laboratory beaker and graduated cylinder. This allows me to get a more accurate measurement of the volume of the specimen, as follows:
a) Fill a beaker with water to one of the graduations so you know pretty accurately how much water is in the beaker.
b) put the specimen in the beaker.
c) fill a graduated cylinder with water up to its top graduation. Now you know exactly how much water is in the graduated cylinder.
d) pour water out of the graduated cylinder into the beaker so the water level rises to the next higher graduation on the beaker that also submerges the specimen. Note how much water was poured out of the graduate cylinder (initial water level minus final water level).
e) the volume of the specimen is equal to the higher graduation in the beaker (measured in step d)) minus the volume of water poured out of the graduated cylinder (step d)) minus the water that was in the beaker before you added the specimen (step a)). |
|


