| View previous topic :: View next topic |
| Author |
Message |
Scott LaBorde
Joined: 14 Dec 2009
Posts: 104
Location: North Carolina


|
 Posted: Mar 04, 2015 10:26 Post subject: Mineral photography setups Posted: Mar 04, 2015 10:26 Post subject: Mineral photography setups |
|
|
I'm looking for a thread here on the forum where mineral photography setups, equipment, and techniques are discussed. I figure surely there has already been a thread created but I'm not able to find it. I'm looking to compare alternate setups to mine, trying to incorporate new ideas, or find where I could improve some things in my own setup.
_________________
Scott LaBorde |
|
| Back to top |
|
 |
Michael Shaw
Site Admin
Joined: 30 Apr 2008
Posts: 2261
Location: Oklahoma
|
| Posted: Mar 04, 2015 12:11 Post subject: Re: Mineral photography setups |
|
|
Hi Scott,
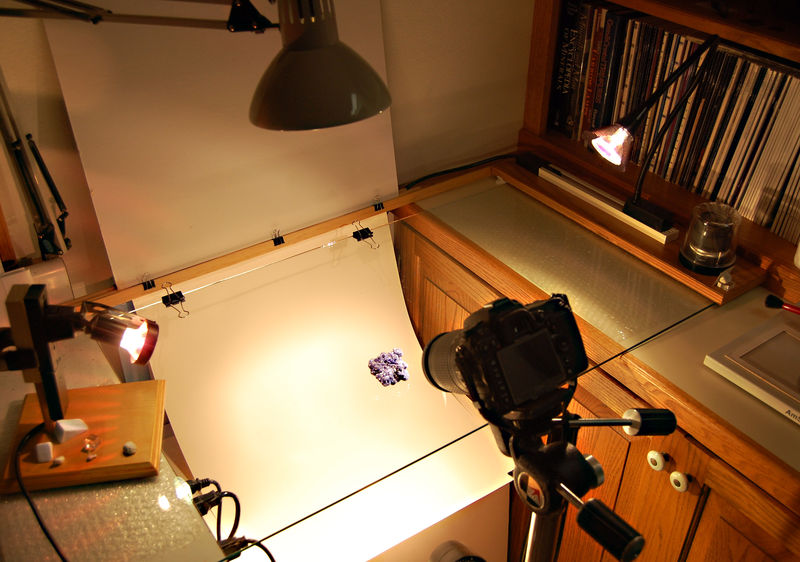
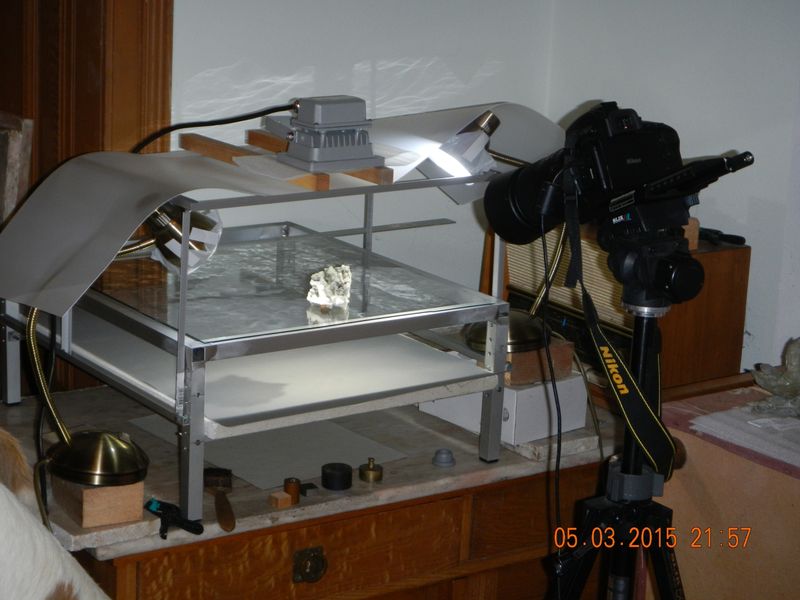
I'm always interested to learn what other folks are using for mineral photography, so I've included a photo of the setup I use. It's a pretty common setup and works well enough for my needs - which is to produce an accurate image of the specimen which can be hyperlinked to my database. I use a Nikon DSLR camera with either an 18-55mm Nikkor lens or a 55mm Micro Nikkor.
For lighting, I use 4 Sylvania MR16 50 W bulbs (one for the background, one on either side of the specimen, and one more or less positioned above the specimen). These bulbs are rated at 3000K and are a bit on the warm side. A better choice would probably be a Solux bulb at 5000K, but I'm using what was easily available where I live, and make any needed adjustments later in Photoshop. The background consists of a black, off-white, or colored paper under the glass, which is partially lit to produce a gradient effect. Various small reflectors are positioned to highlight crystal faces, and occasionally diffusers are used to moderate the lighting.
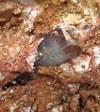
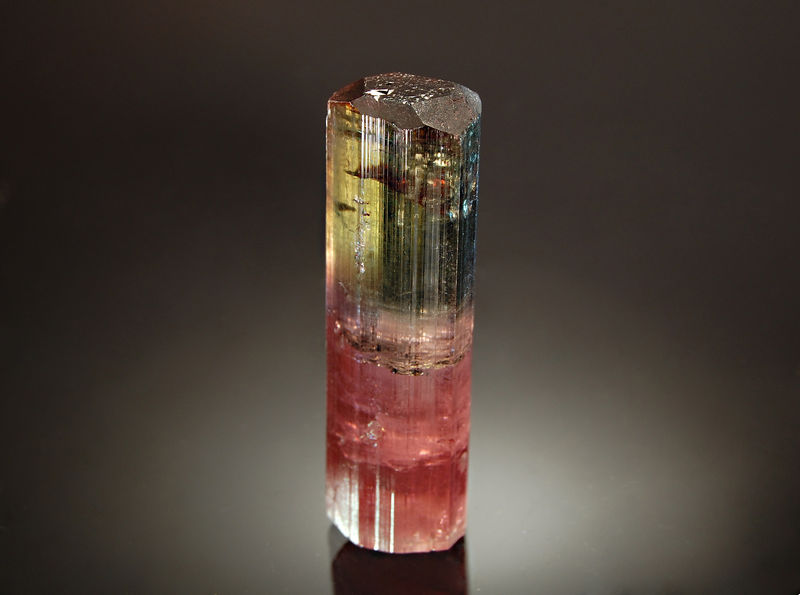
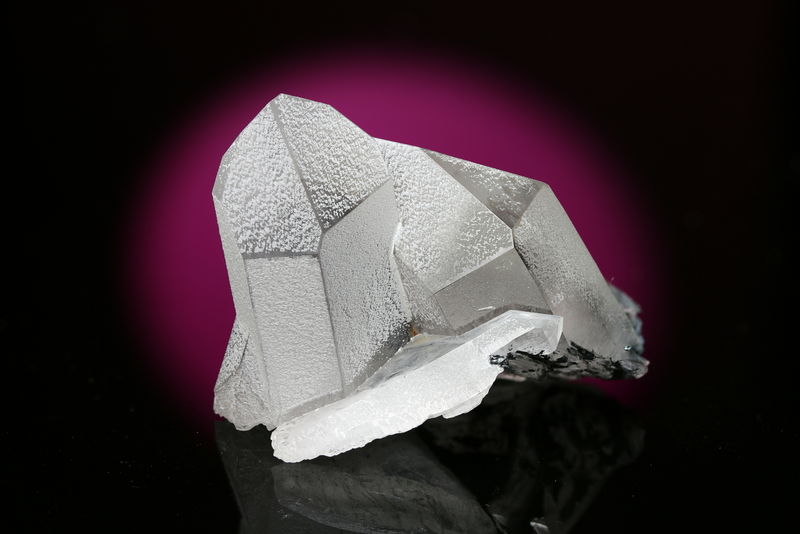
You can see results of this setup in my collection thread. More recently, I have been experimenting with a black background without the background light. Instead the background light is directed at a white foam-core board placed perpendicular to the glass in back of the specimen. When adjusted properly, this creates a highlighted area which give the viewer a sense of depth instead of the mineral looking like it's floating in space. I've had some moderate success with this setup and I'm still learning and experimenting. The second photo of the elbaite is an image taken with this setup.
Why don't you post a photo of your setup - I always like to see what other people are using.
Michael Shaw
| Description: |
|
| Viewed: |
31201 Time(s) |
|
| Description: |
|
| Viewed: |
31219 Time(s) |
|
|
|
| Back to top |
|
|
Roger Warin

Joined: 23 Jan 2013
Posts: 1246
|
| Posted: Mar 04, 2015 17:03 Post subject: Re: Mineral photography setups |
|
|
Whatever the set up, the magic works wonderfully. Well Done.
Roger.
|
|
| Back to top |
|
|
Martin Rich

Joined: 15 Aug 2013
Posts: 127
Location: Lower Austria
|
| Posted: Mar 05, 2015 17:00 Post subject: Re: Mineral photography setups |
|
|
Interesting thread! I'm learning during every photo session and sometimes it is very tricky to get a good photo. Maybe it is of interest what setup I use: My camera is a Nikon D5100. For bigger specimens, I use the common 18-55 mm lens. In the most cases I use a Micro Nikkor 85 mm (for a bigger magnification additional tubes). The camera is operated by remote control directly from my computer with digiCamControl. Photo software: Gimp 2. 8. 10, Combine ZB.
Lighting: 2 or if necessary 3 LED lamps with 10 W (single LED chip!) and 6200° K. A diffuser is important!
A self made photo table, made with aluminum tubes. Ok, I have a welding equipment with TIG kit (I think, this equipment is not in every household :) ).
I arrange the background with gray, white or sometimes colored paper and the specimen is placed on a glass plate.
Martin
| Description: |
|
| Viewed: |
30782 Time(s) |
|
_________________
We are living on the matrix. |
|
| Back to top |
|
|
Elise
Joined: 22 Dec 2009
Posts: 243
Location: New York State
|
|
| Back to top |
|
|
Scott LaBorde
Joined: 14 Dec 2009
Posts: 104
Location: North Carolina
|
| Posted: Mar 05, 2015 19:19 Post subject: Re: Mineral photography setups |
|
|
Thank you Michael and Martin. I've always wanted to try the lifted glass method. It would certainly make background spot light set up a lot easier it seems.
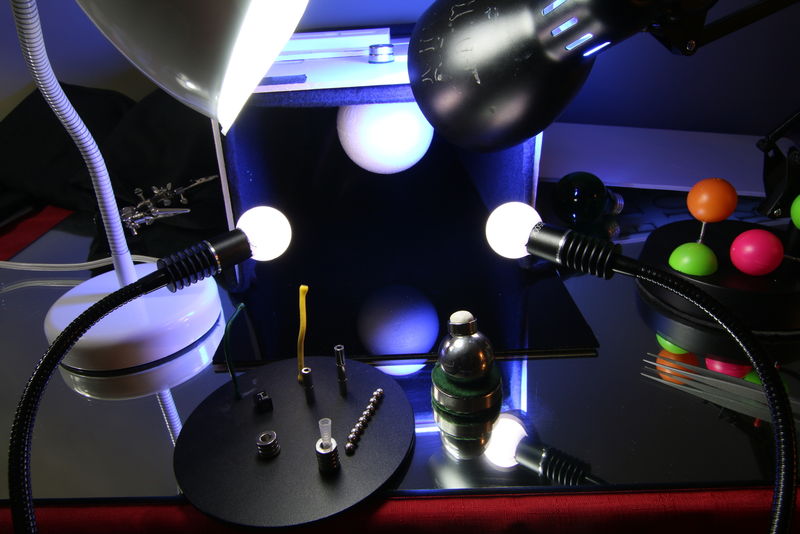
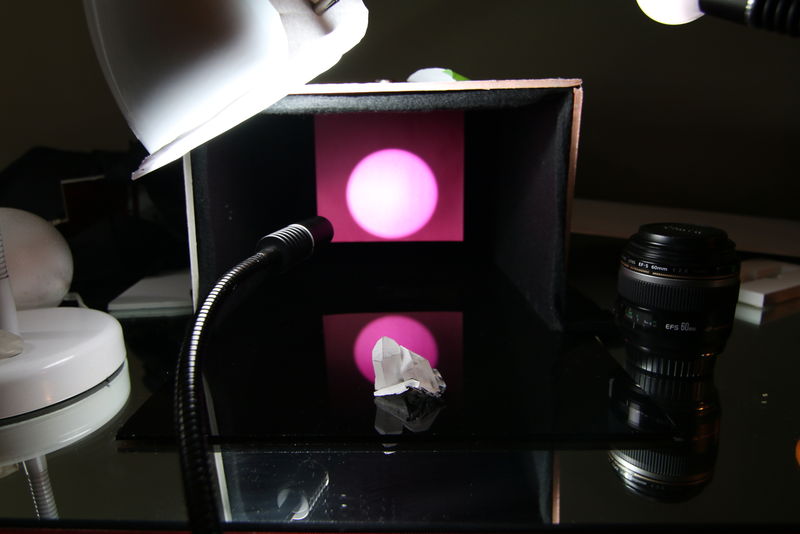
I tried to place most all of my main tools in one photo for the purpose of efficiency, however, I rarely use more than a few of them at one time.
I constructed the over sized shoe box contraption with some scrap foam core board. I lined the inside with black felt cloth. Its purpose is mainly for both trapping and preventing light from entering. This allows me to have much less background noise for an even more dramatic black.
I recently switched to using black glossy acrylic as opposed to the mirror I have underneath that. I didn't like the double reflections you get from glass (one from both sides of the glass) -- just a personal preference. The black circular plate is metallic so that I can maneuver those various magnets to hold reflectors for more light options.
The ball bearing is another DIY contraption also using ring magnets. I use it as a specimen platform. Its a ball and socket joint system that allows me to adjust the specimen to almost any angle. This is typically used for smaller specimens. The disadvantage is that I would have to digitally remove the base from the photo. And I'm too lazy to work too long in photoshop or Gimp.
As for lights, you can see my preference for gooseneck attachments. I cut holes in ping pong balls so that they could slide snuggly over my LED lamps, visible in the photo.
The white styrofoam ball in the box is held in place by a magnet I have on top. This way I can move the ball to any position by sliding the magnet around on top. Alternatively I can hang a colored piece of origami paper and shine a spot light on it -- I used that method in the last two photos.
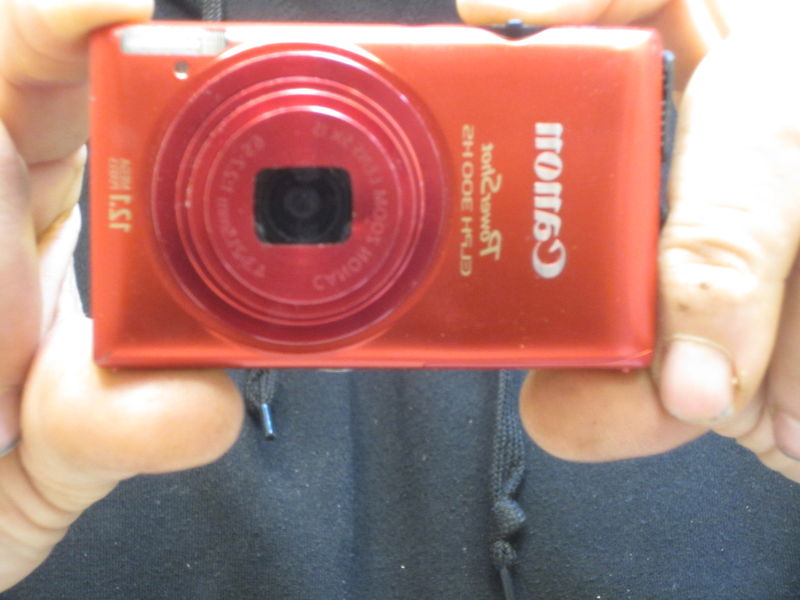
Cannon EOS 70D
Lens: Cannon EFS 60mm
Stacking software: Helicon Focus
| Description: |
|
| Viewed: |
30695 Time(s) |
|
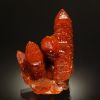
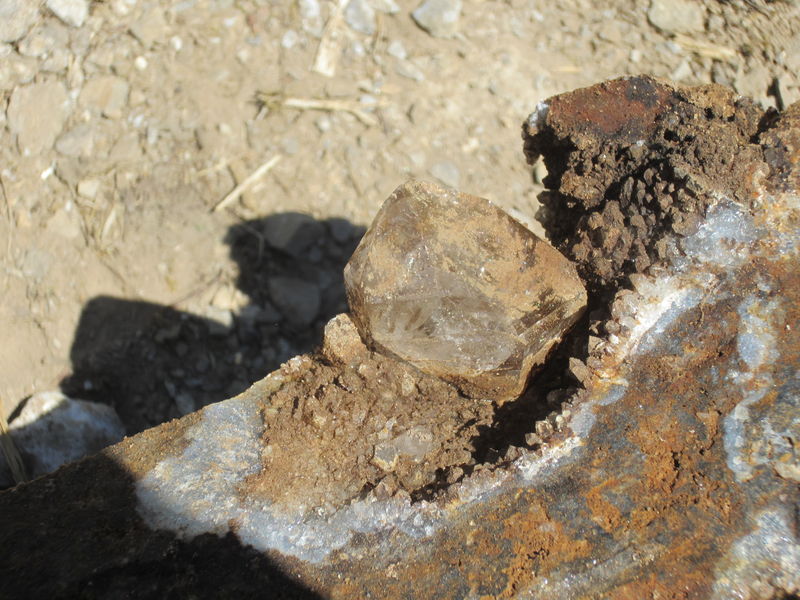
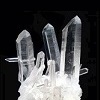
| Mineral: | Quartz |
| Locality: | | Coopers Ridge, Pittsboro, Chatham County, North Carolina, USA |  |
|
| Dimensions: | 4.5 x 4 x 3 cm |
| Description: |
| One of many beautiful clusters I dug at this location. |
|
| Viewed: |
30705 Time(s) |
|
| Description: |
|
| Viewed: |
30684 Time(s) |
|
_________________
Scott LaBorde |
|
| Back to top |
|
|
NellsRocks

Joined: 10 May 2015
Posts: 61
Location: Massachusetts
|
| Posted: Jun 24, 2015 15:50 Post subject: Re: Mineral photography setups |
|
|
Feeling highly substandard now...
;-)
Now I know how all those dealers get such nice images!!!
|
|
| Back to top |
|
|
Scott LaBorde
Joined: 14 Dec 2009
Posts: 104
Location: North Carolina
|
| Posted: Jun 25, 2015 07:35 Post subject: Re: Mineral photography setups |
|
|
| NellsRocks wrote: | Feeling highly substandard now...
;-)
Now I know how all those dealers get such nice images!!! |
No reason to feel that way. My setup is very cheap. The hardest part is simply just getting started and putting a little effort into putting it together. Once your setup has been created, then it's just polishing your photo taking skills. :)
_________________
Scott LaBorde |
|
| Back to top |
|
|
vic rzonca

Joined: 18 Nov 2008
Posts: 820
Location: MA
|
| Posted: Jun 25, 2015 08:36 Post subject: Re: Mineral photography setups |
|
|
I'm with Scott, and not one to miss a chance to embarrass myself, this is my field set-up.
| Description: |
|
| Viewed: |
29103 Time(s) |
|
| Description: |
| Some of my work. Quartz to 4 cm. |
|
| Viewed: |
29094 Time(s) |
|
|
|
| Back to top |
|
|
NellsRocks
Joined: 10 May 2015
Posts: 61
Location: Massachusetts
|
| Posted: Jun 25, 2015 15:00 Post subject: Re: Mineral photography setups |
|
|
| OK, you guys inspired me... Broke out the homemade foam-board contraption I made a while ago to try and model my 1/24 cars, ultra-cheap tripod, one lamp, and The Canon. Time to see if any of the 85 pics came out!!
|
|
| Back to top |
|
|
Tobi
Site Admin
Joined: 07 Apr 2009
Posts: 4251
Location: Germany
|
| Posted: Jun 27, 2015 10:40 Post subject: Re: Mineral photography setups |
|
|
| Some days ago, Mindat featured an article about an advanced way of mineral photography. Could be quite expensive, but reading the article and looking at the animated pictures is really worth it: https://www.mindat.org/a/360_spin_mineral_photography
|
|
| Back to top |
|
|
Scott LaBorde
Joined: 14 Dec 2009
Posts: 104
Location: North Carolina
|
| Posted: Jun 29, 2015 11:10 Post subject: Re: Mineral photography setups |
|
|
| NellsRocks wrote: | | OK, you guys inspired me... Broke out the homemade foam-board contraption I made a while ago to try and model my 1/24 cars, ultra-cheap tripod, one lamp, and The Canon. Time to see if any of the 85 pics came out!! |
If you have one of those really flimsy tripods, make sure you set the self timer to at least a few seconds so that it will give your tripod a chance to stop moving after you've manually pressed and released the shutter button. But if you have a remote or wireless shutter release then you're good to go. To improve stability even further I've heard you should physically attach the tripod to your specimen table or platform. This can be done by sticking a blob of mineral tac to one of the tripods legs and making sure it is firmly contacted to the table. In this way, if there are any ambient or accidental vibrations then they at least will all moving together as one and thus have little to no negative affect on the photograph (at least in theory).
_________________
Scott LaBorde |
|
| Back to top |
|
|
|